
By Tom Feiza, Mr. Fix-It, Inc., HowToOperateYourHome.com (htoyh.com)

Private well systems are not part of most home inspections. However, you should understand their basic components and possible repair issues so you can inform homeowners of their responsibilities. Since you won’t often see a well pump replacement, here it is – the “big reveal.”
Private well components
Illustration P055 shows the basic components of a private well system. A submersible pump sits inside a well casing, below the water level. The top of the steel casing is situated above the soil to keep contaminants out.
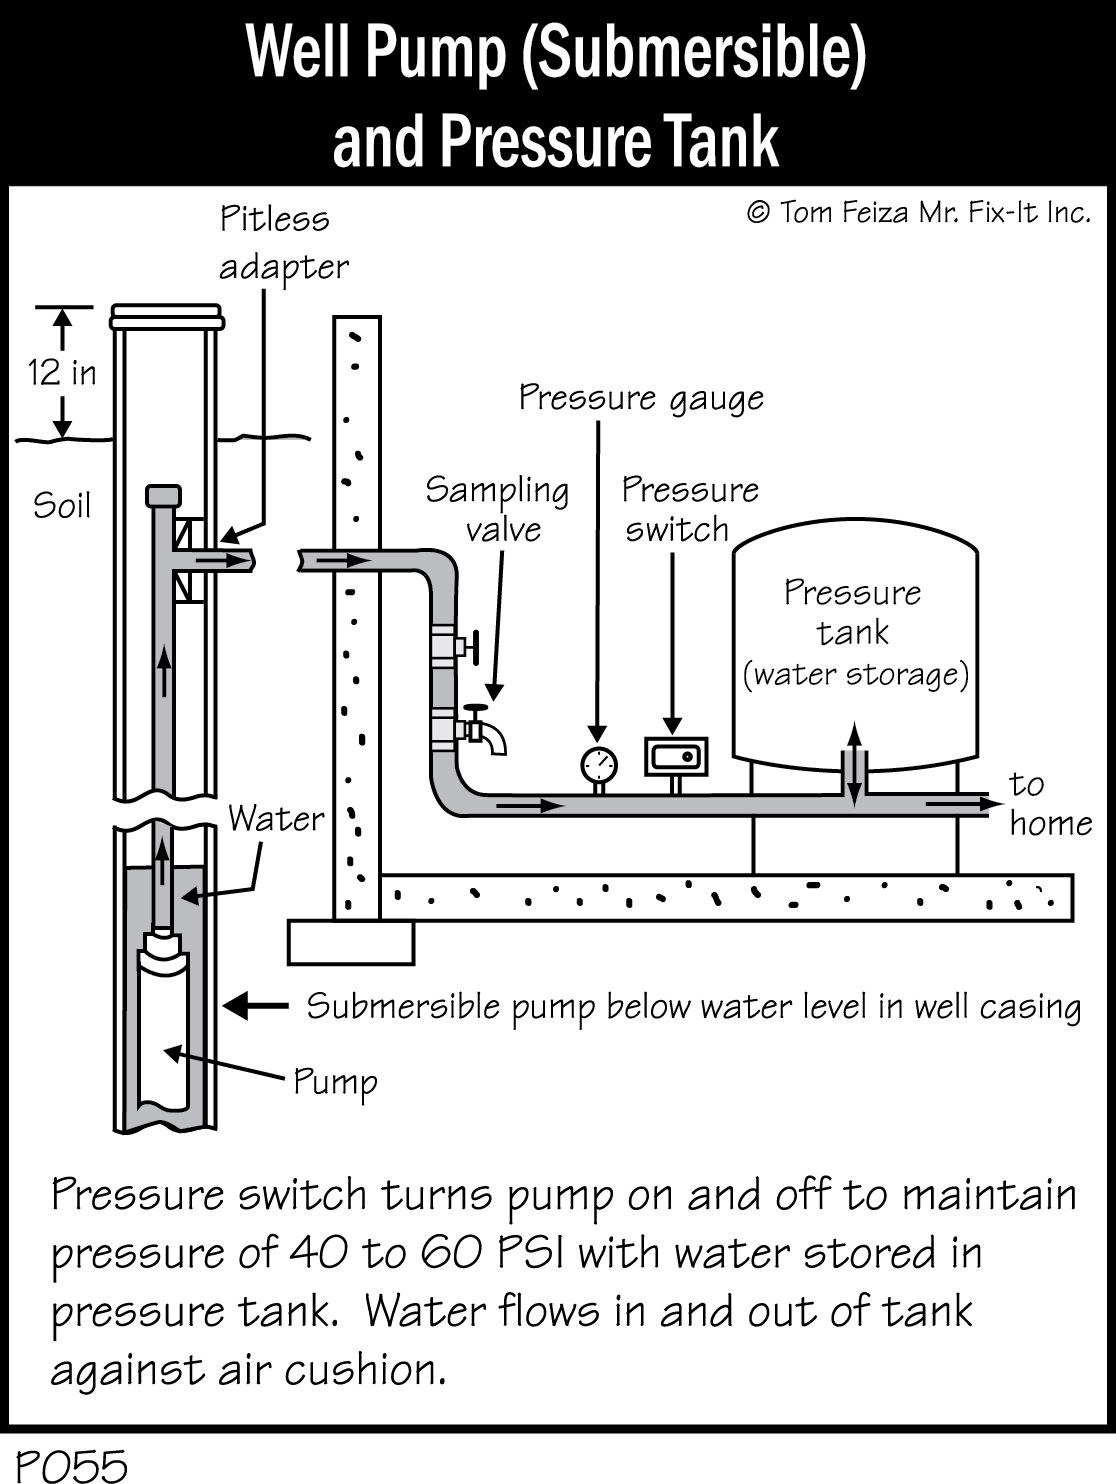
Water flows up from the pump, through a pitless adaptor, and into the home’s pressure/storage tank. Pump controls are located near the tank, and a pressure switch activates the pump.
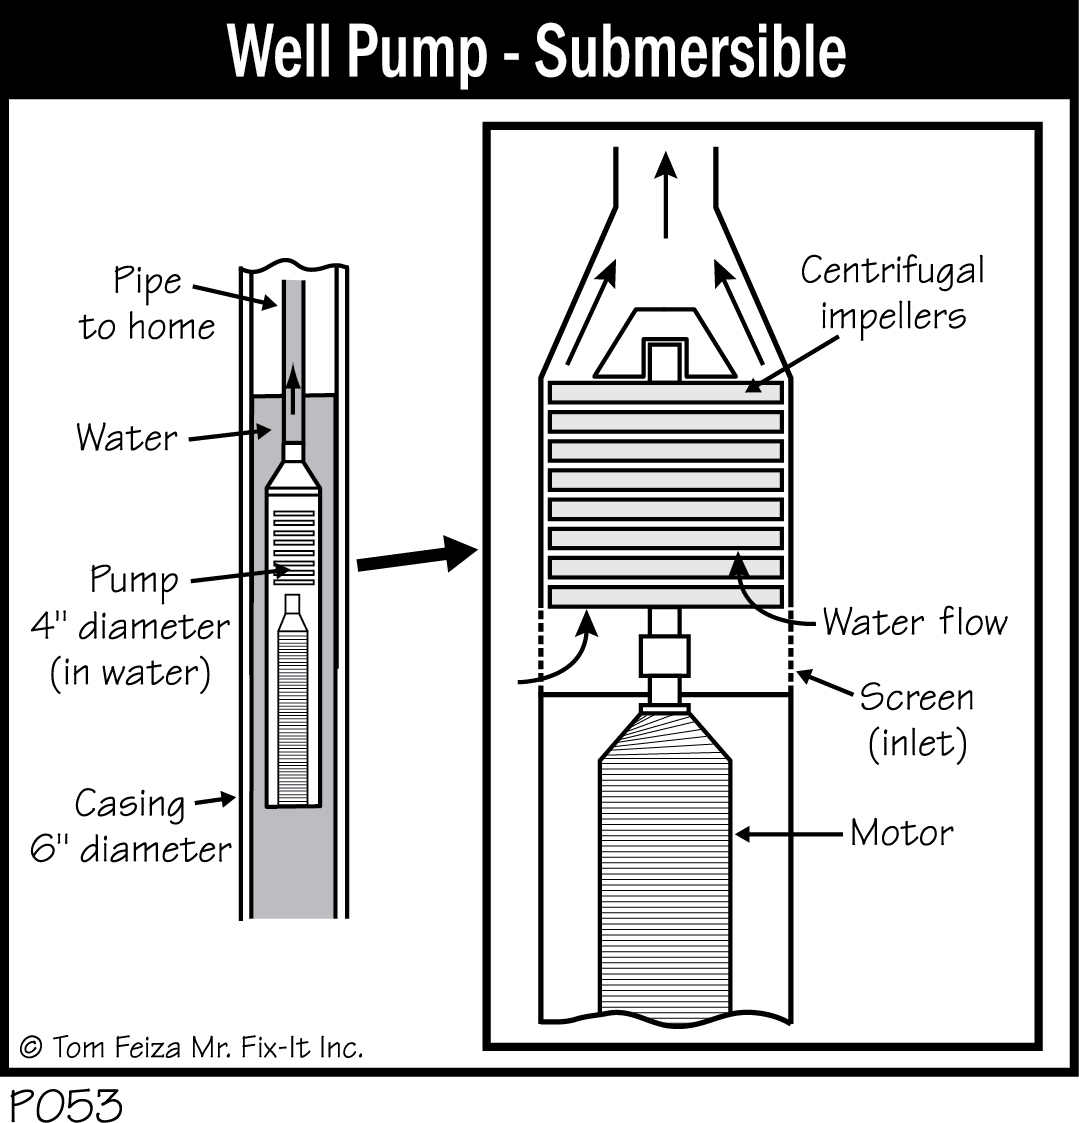
Illustration P053 represents a basic centrifugal submersible well pump. The pump, about 4 inches in diameter and 30 inches long, has multiple centrifugal impellers properly sized for the well depth and flow requirements.
Replacing a pump
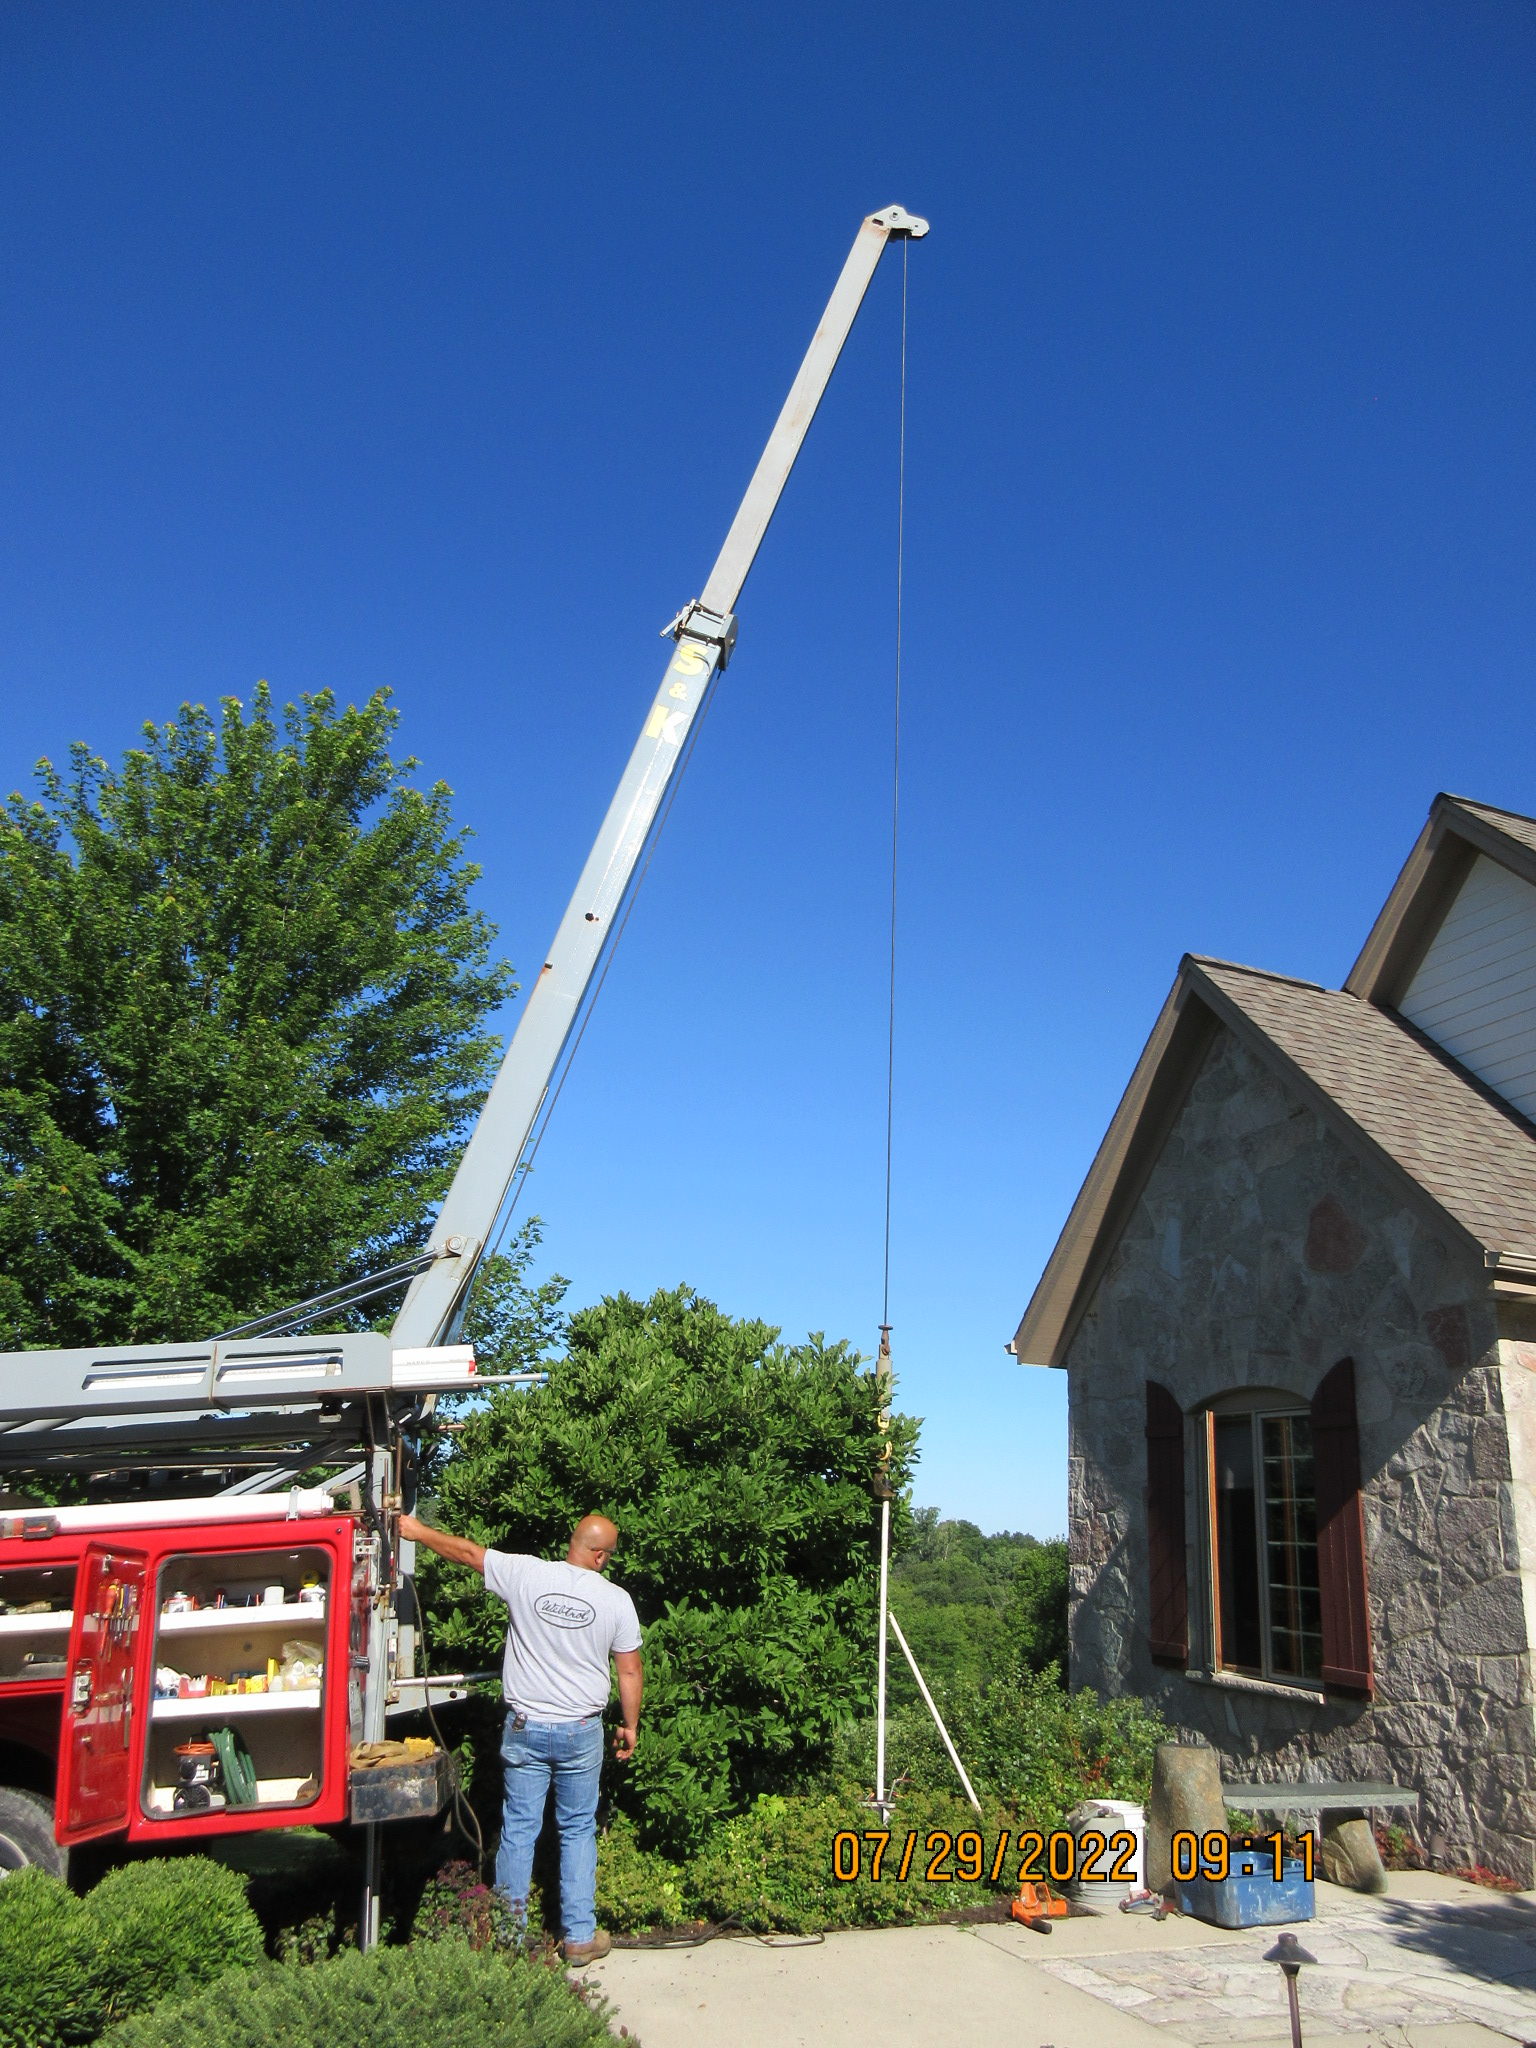
Well pumps often fail after about 10 to 15 years, at which point the pump must be replaced. Photo 1 shows typical equipment used for pump replacement. A small truck-mounted crane lifts the pump and piping from the well. In this example, the top of the crane extends about 25 feet over the well casing.
Pitless adaptor and special tools
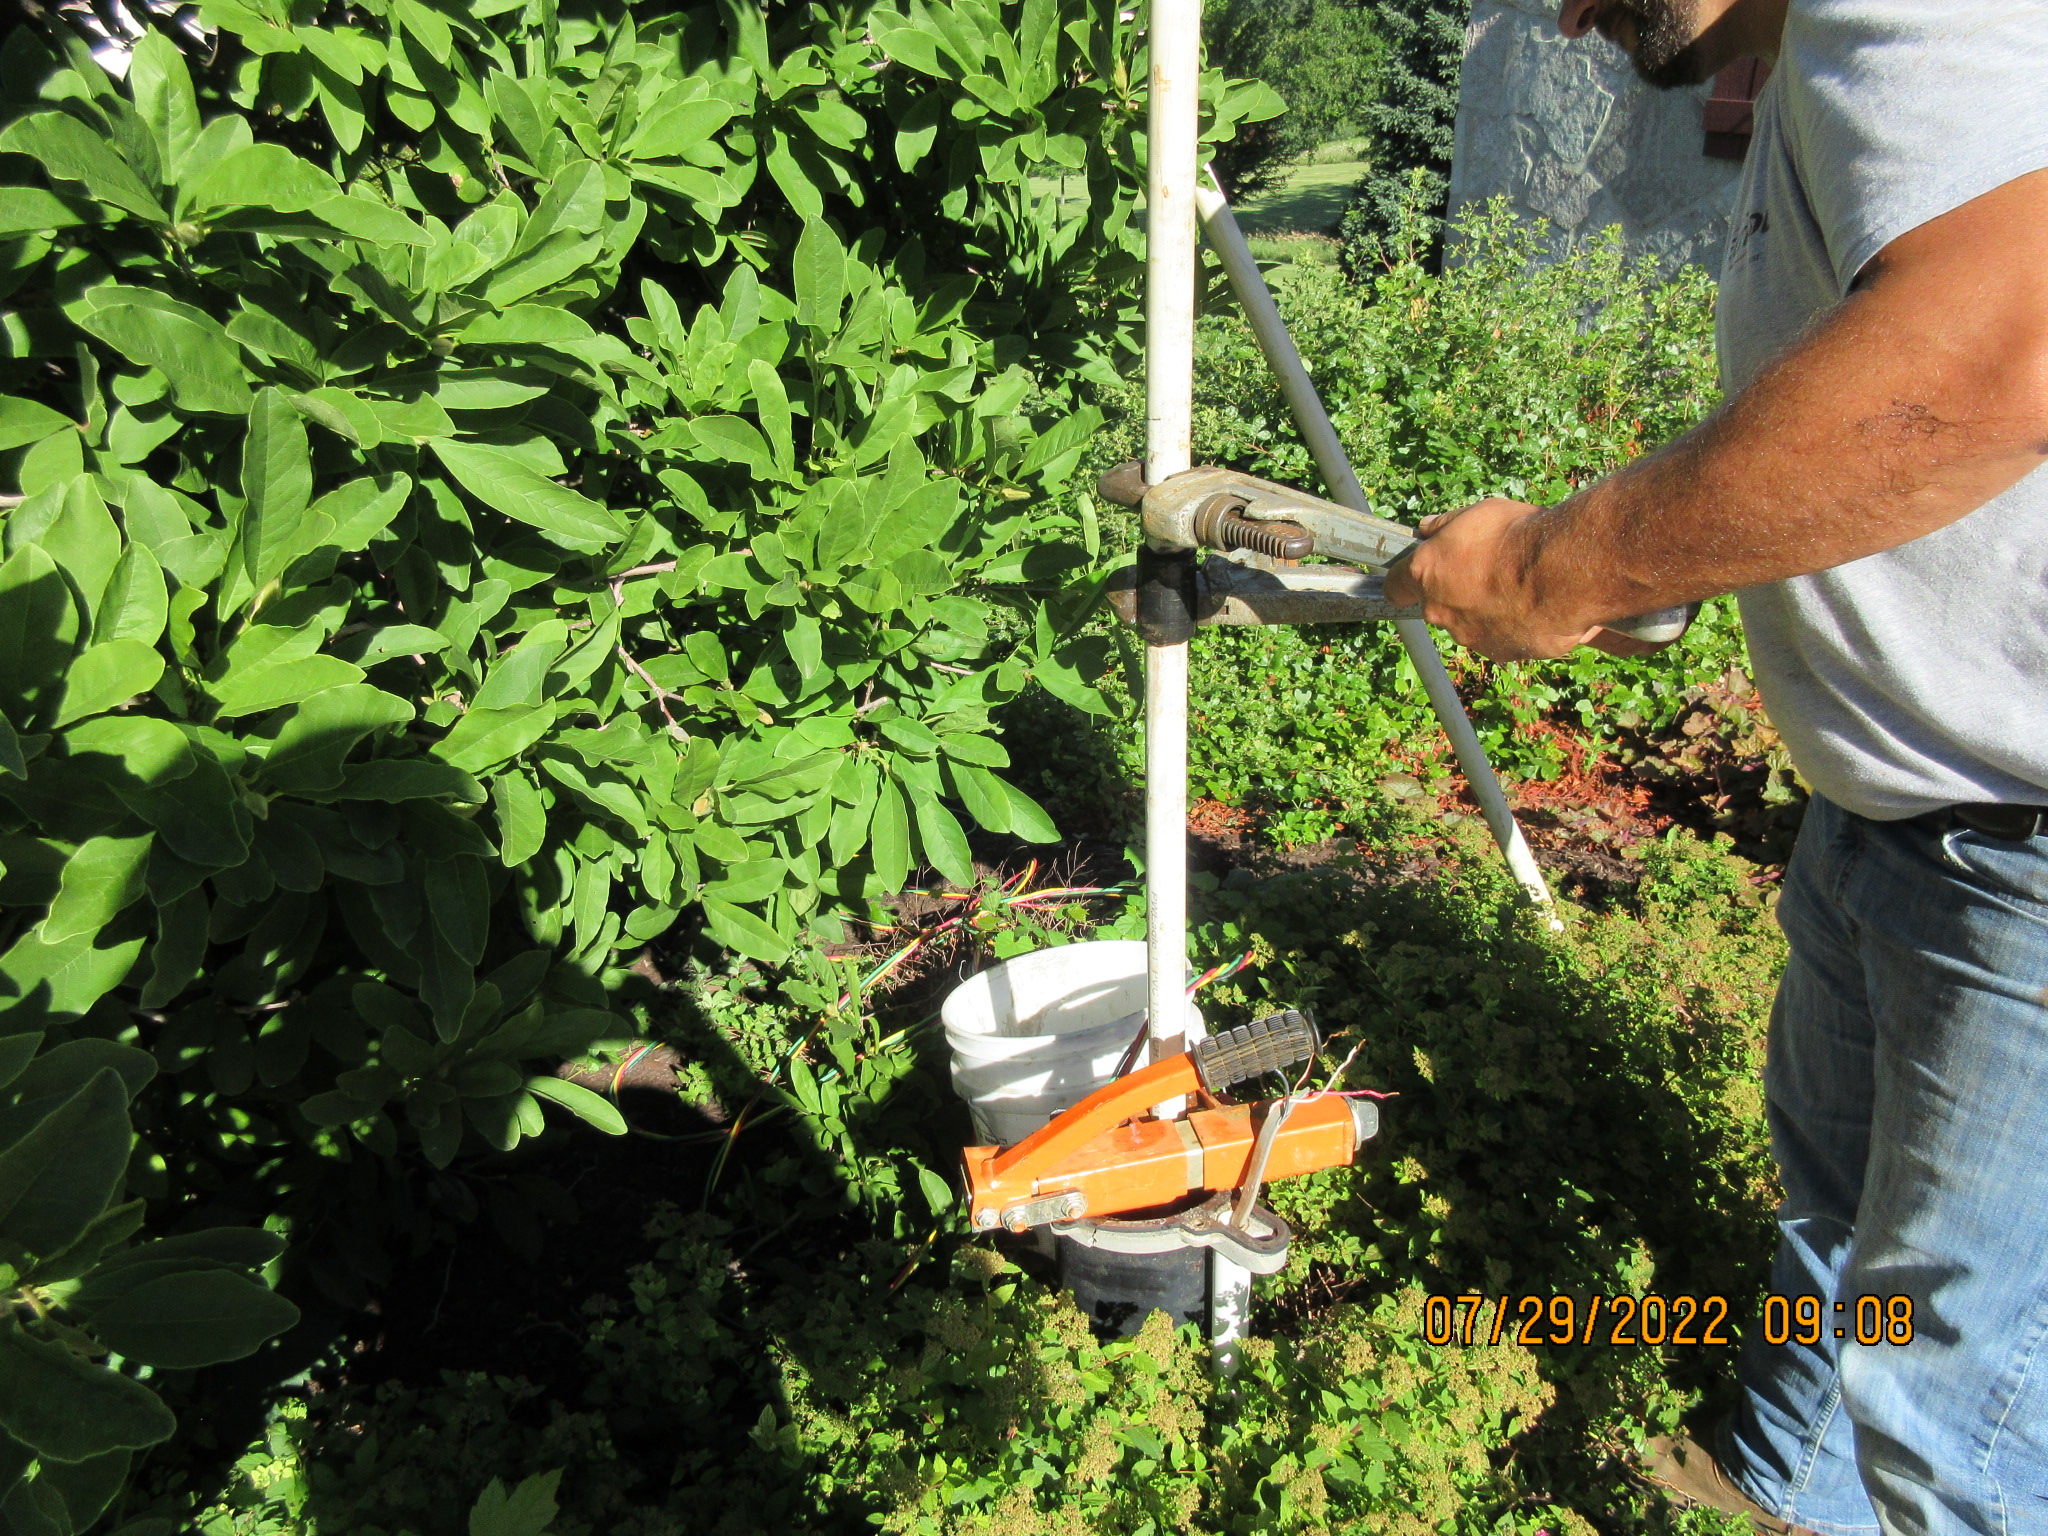
The plumber removes the well casing cover, then lifts the first section of pipe to expose a device called the pitless adaptor, which looks like an upside-down brass trap (Photo 2). Its name derives from a patent filed in 1953 by Milton B. Martinson for a way of extracting well water without creating a pit, the common practice at that time.
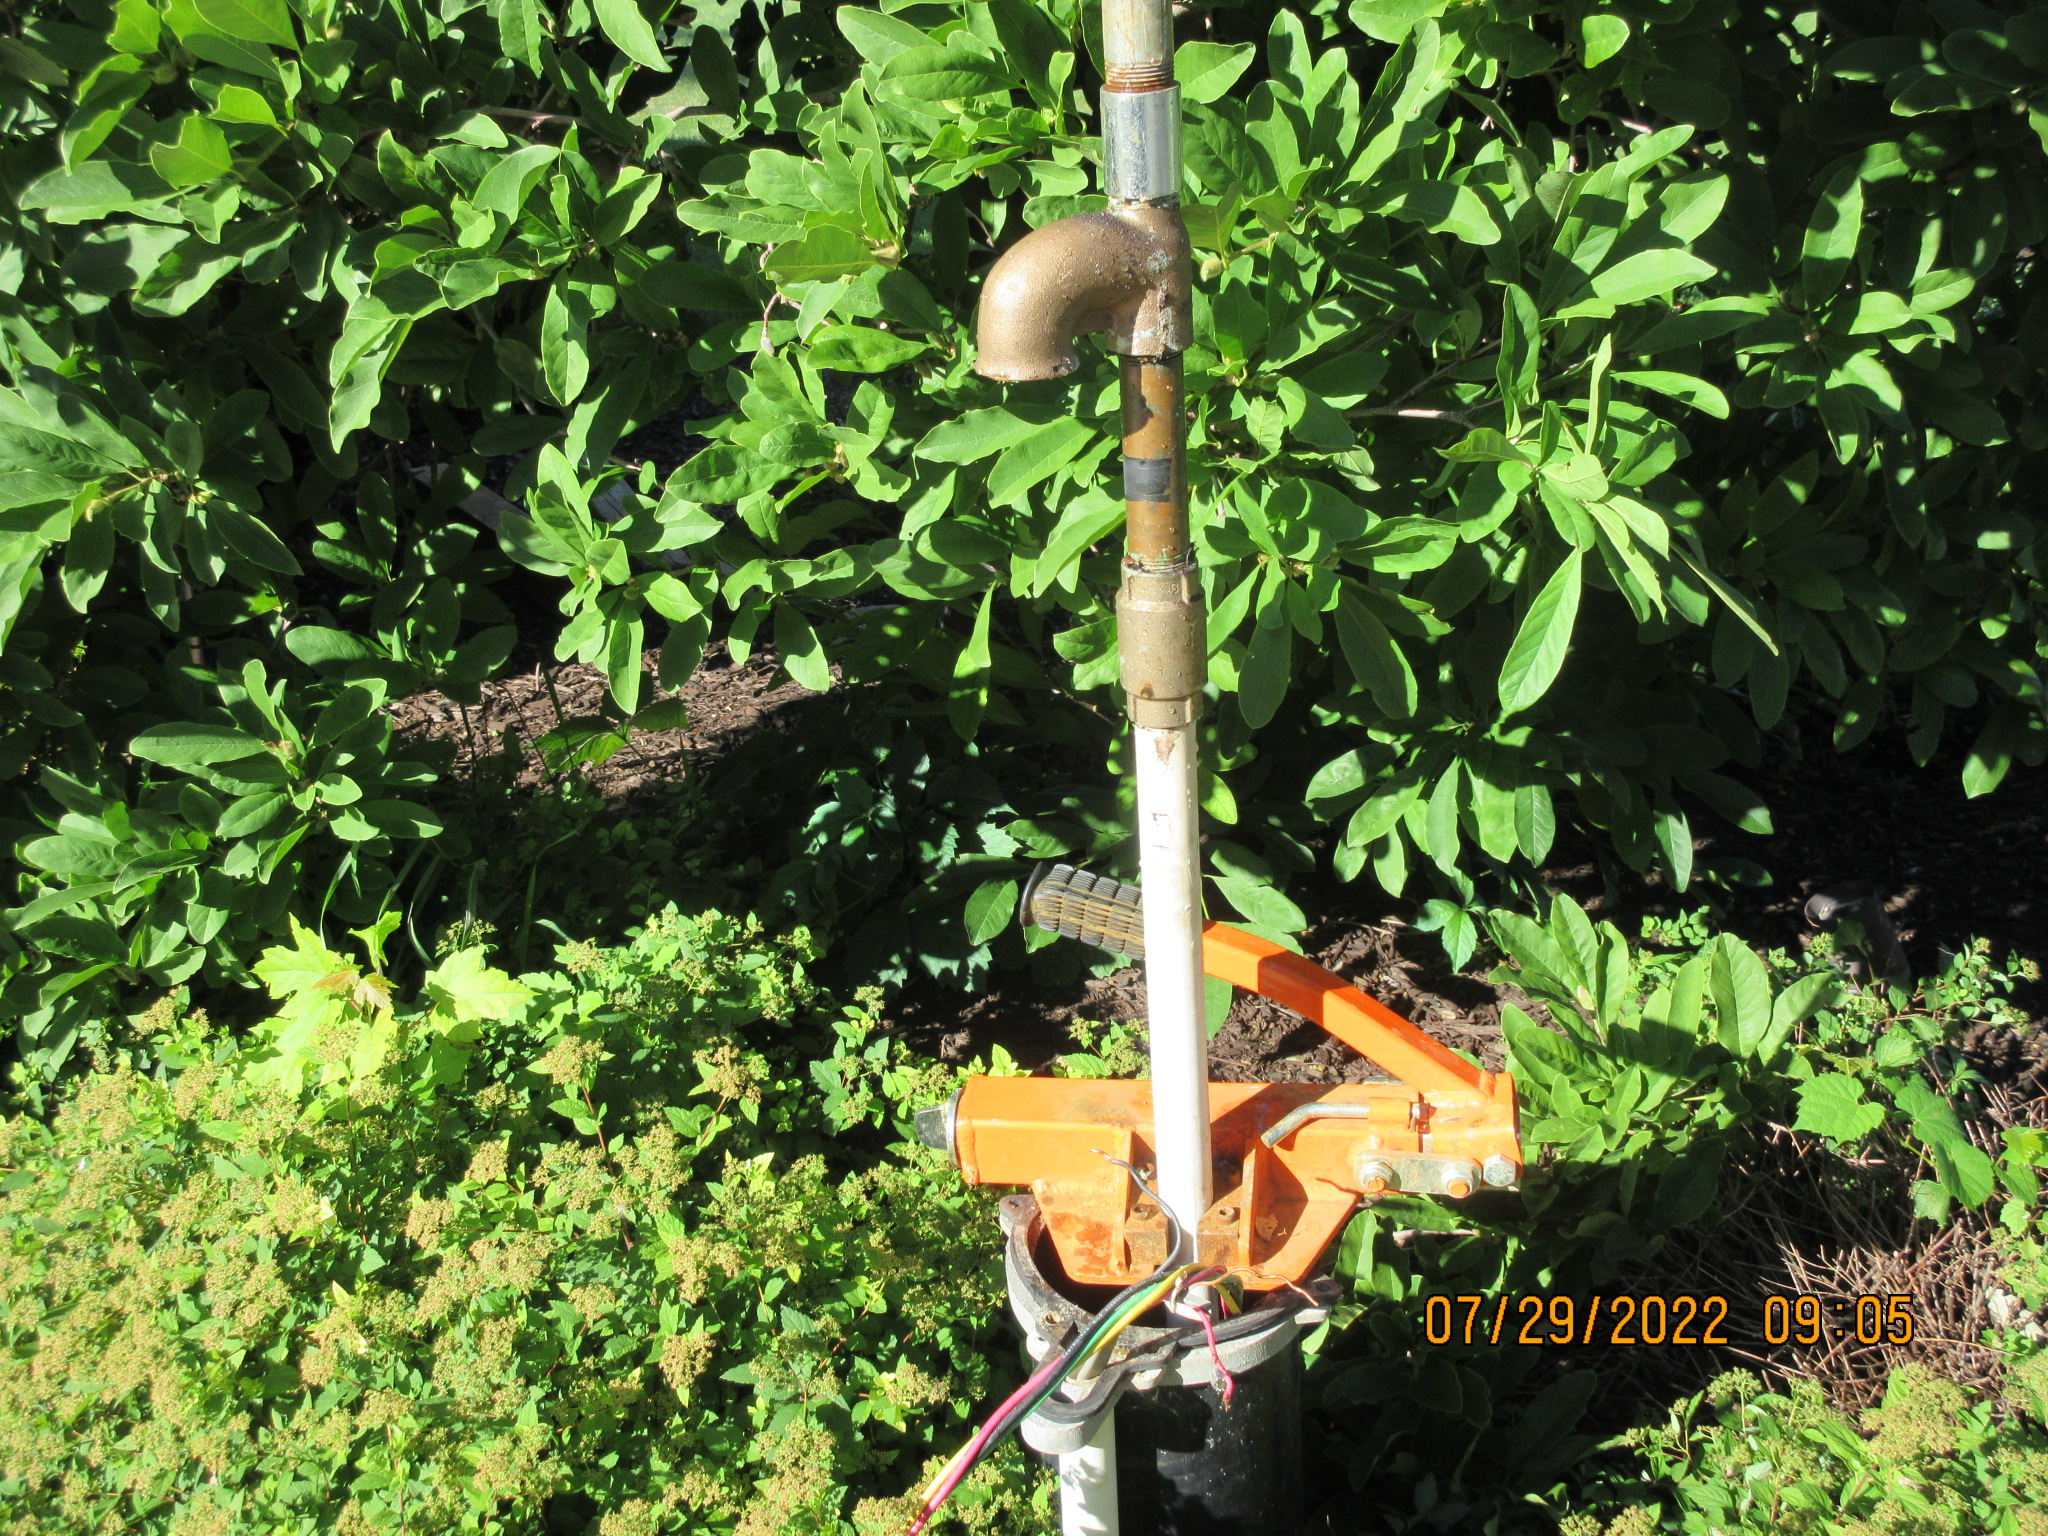
The adaptor provides a junction between the drop pipe in the well and the water line running into the house. It enables work on the drop pipe, wire and pump without compromising the existing installation. The plumber screws a t-bar tool or steel pipe into the threaded top of the adaptor to remove it (pull it), leaving in place another piece of the adaptor.
Also visible in this photo is an orange clamp tool atop the well casing; it holds the pipe as it is lifted.
Raising the pump
The crane lifts the well pipe and pump in sections, with threaded couplers about every 20 feet allowing removal of sections. Photo 3 shows the plumber disconnecting a section of pipe as the clamp holds the pipedown to the pump steady. The plumber then attaches the crane to a lower section of pipe and repeats the process as often as necessary. A submersible pump might be placed several hundred feet below grade to reach the existing water table.
The old pump
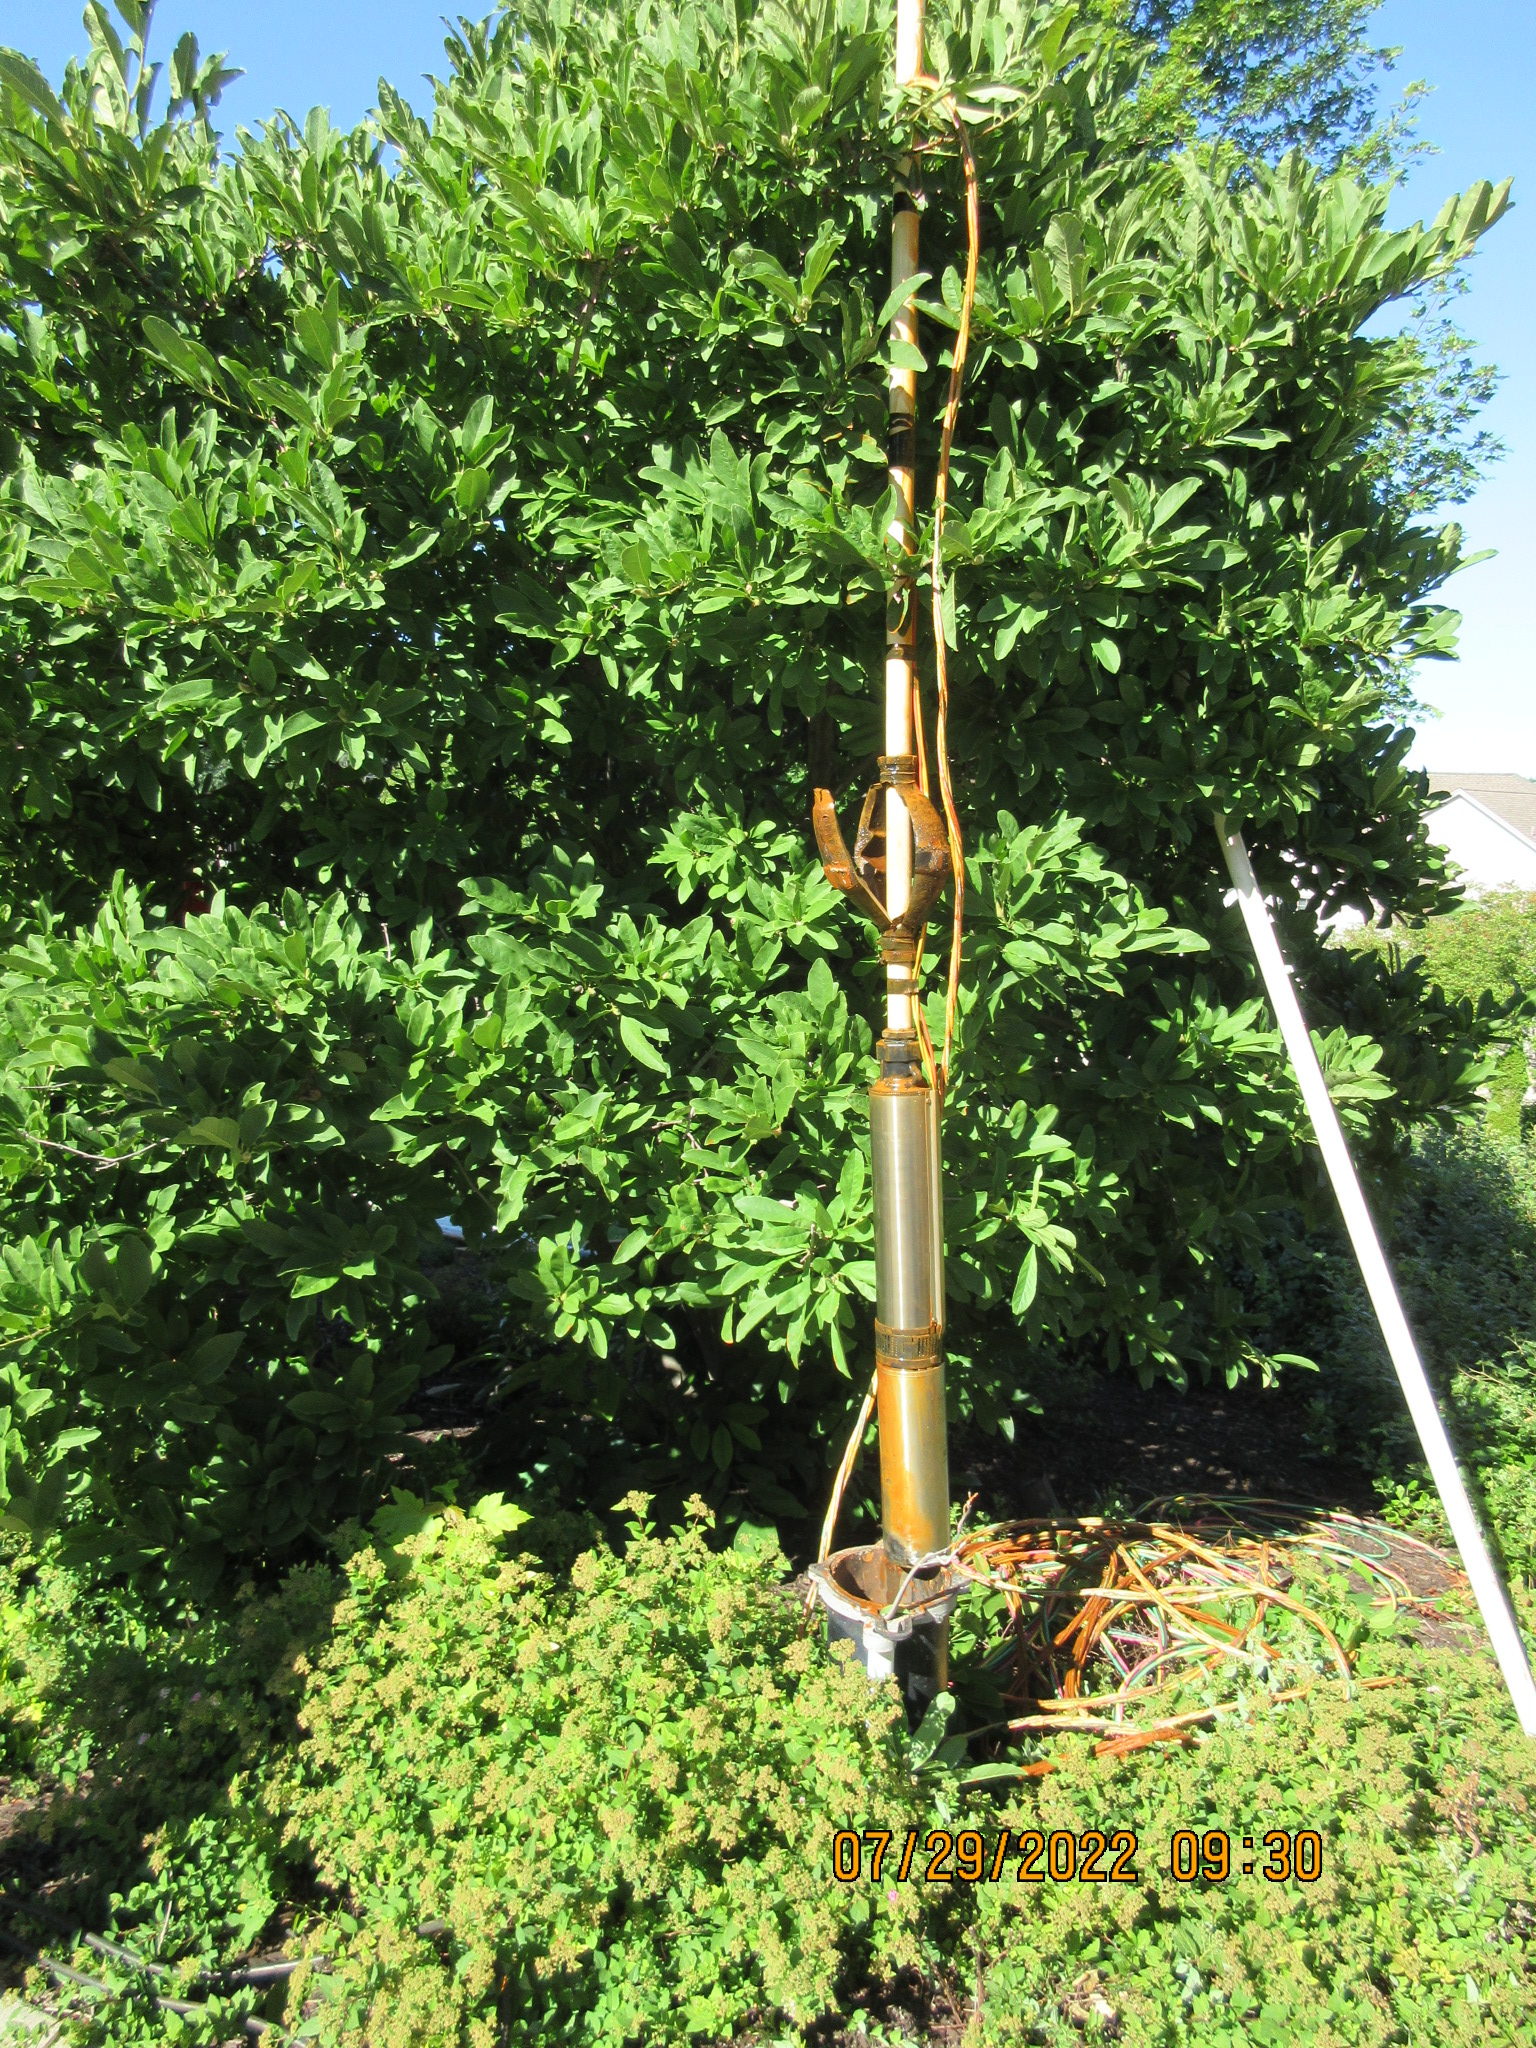
In Photo 4 we see the old pump and its wiring lifted just above the well casing. The fitting above the pump centers it and transfers torque to the casing. This pump is 240V and 1 HP. It lifts about 25 gallons of water per minute up 125 feet.
The takeaway
A basic understanding of submersible pump systems helps you properly caution your buyers about responsibilities and potential repair costs of a private well system. You should recommend evaluation by a professional as well as water-quality testing.
Tom Feiza has been a professional home inspector since 1992 and has a degree in engineering. Through HowToOperateYourHome.com (htoyh.com) he provides high-quality books and marketing materials that help professional home inspectors educate their customers. Copyright © by Tom Feiza, Mr. Fix-It, Inc. Reproduced with permission.