
By Tom Feiza
When hanging a cabinet, shelf or large mirror, we often need to place fasteners into wall studs or framing for proper support. Finding those studs can be frustrating. Tapping on the wall with your fist just doesn’t cut it. To use the trade secrets of finding studs hidden behind your walls, you must understand a little about lumber and construction.
Typical Lumber and Wall Construction
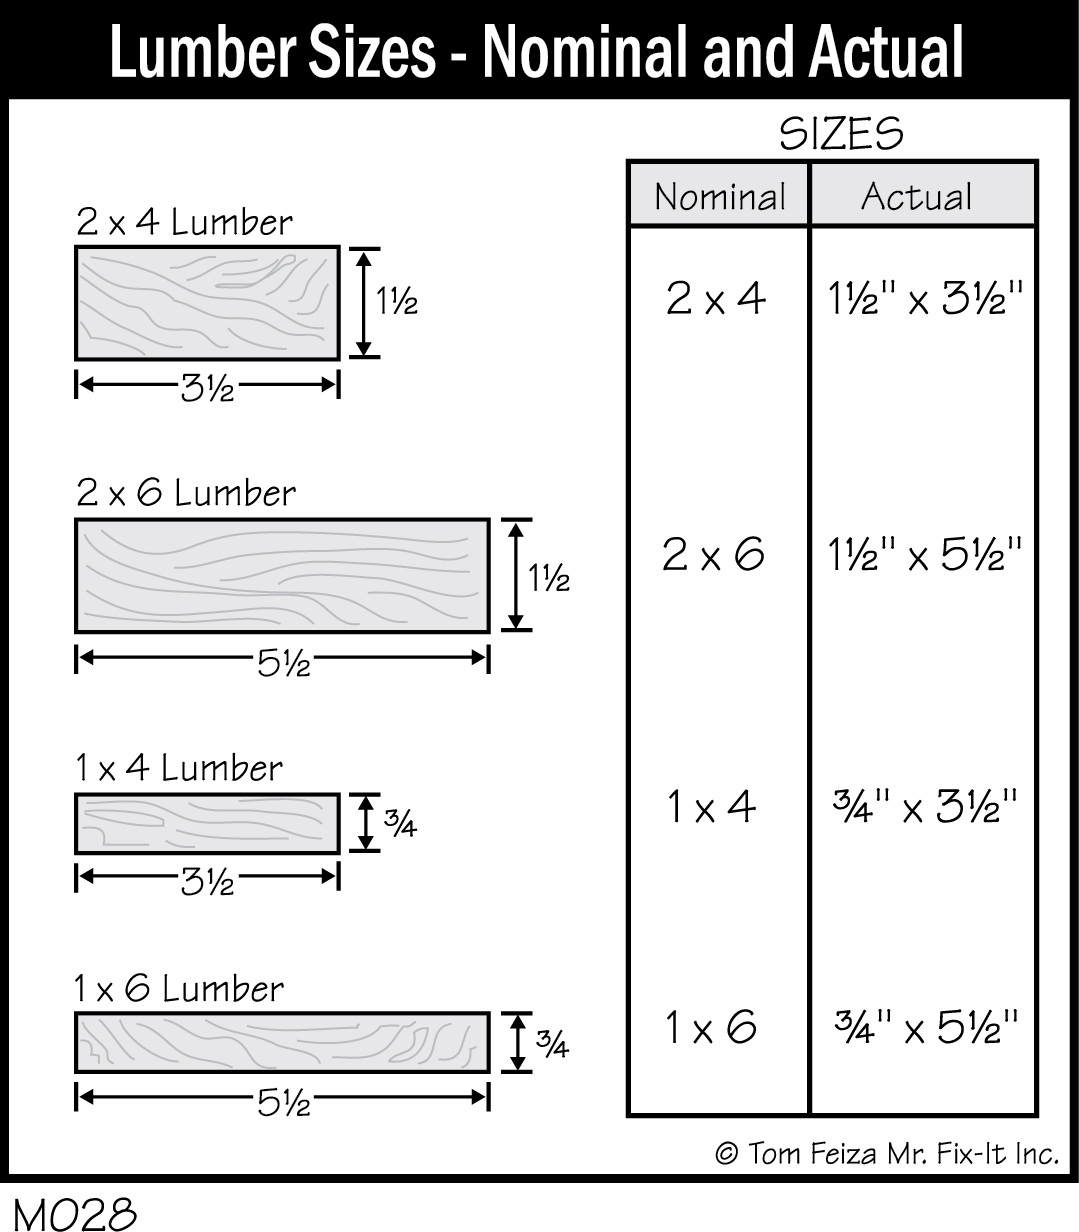
Residential walls are typically constructed of 2 x 4 or 2 x 6 nominal dimension lumber. This means the actual dimensions of a 2 x 4 are 1½ x 3½ after the rough 2 x 4 is dried and planed smooth.
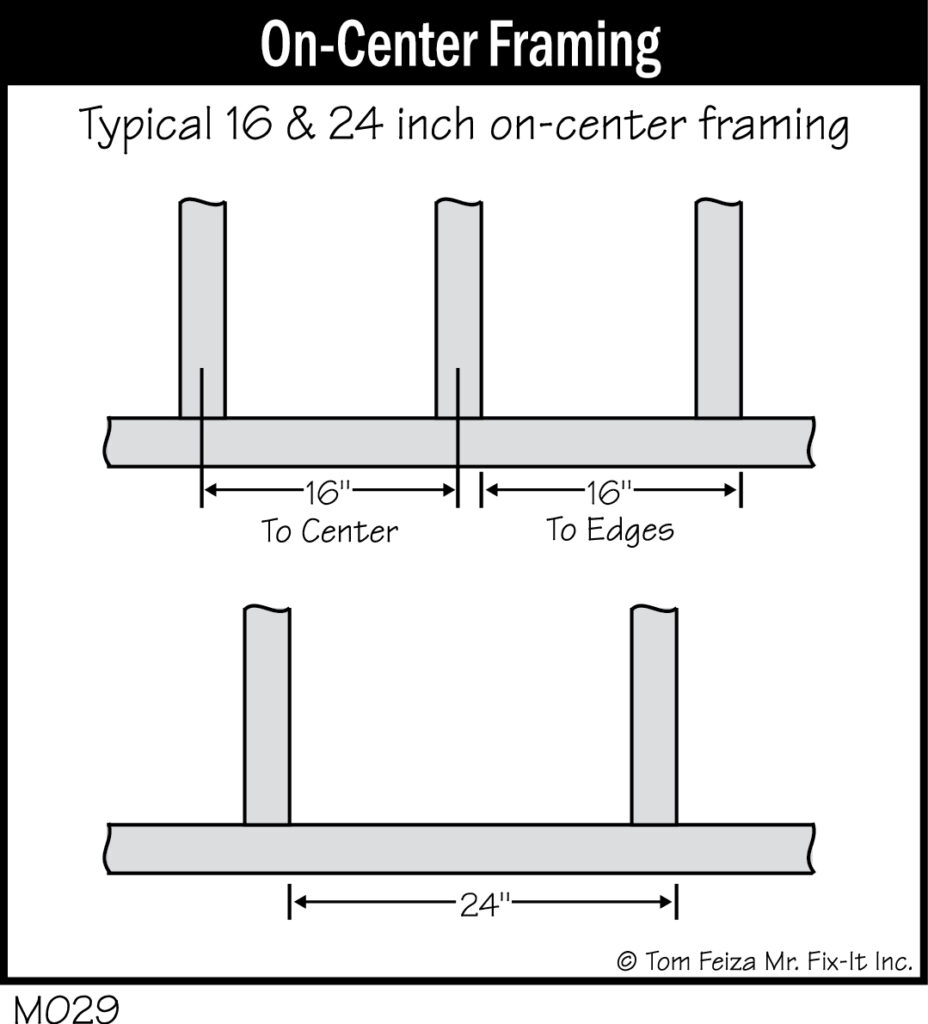
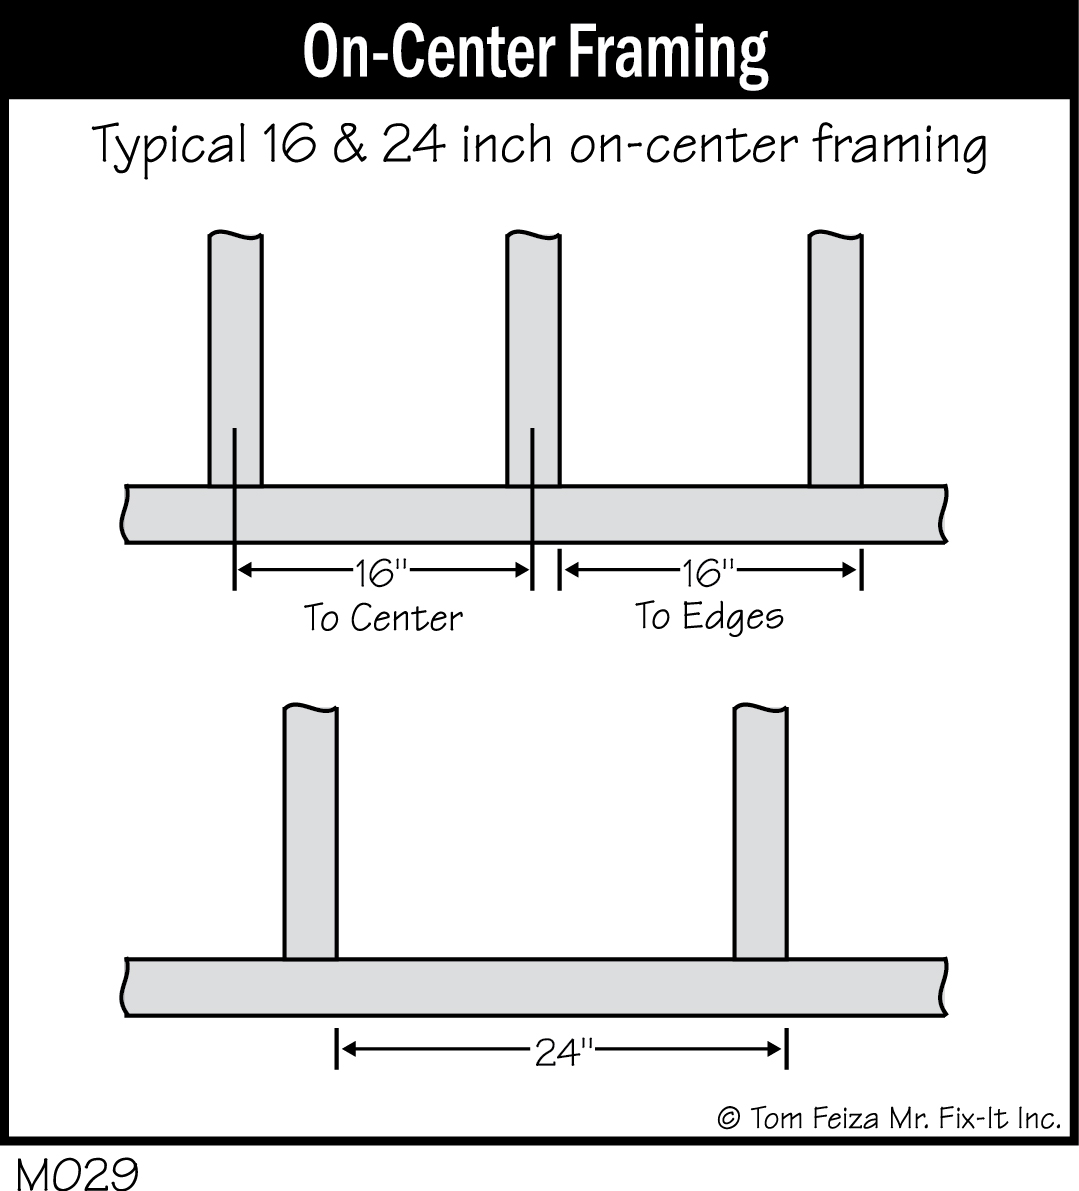
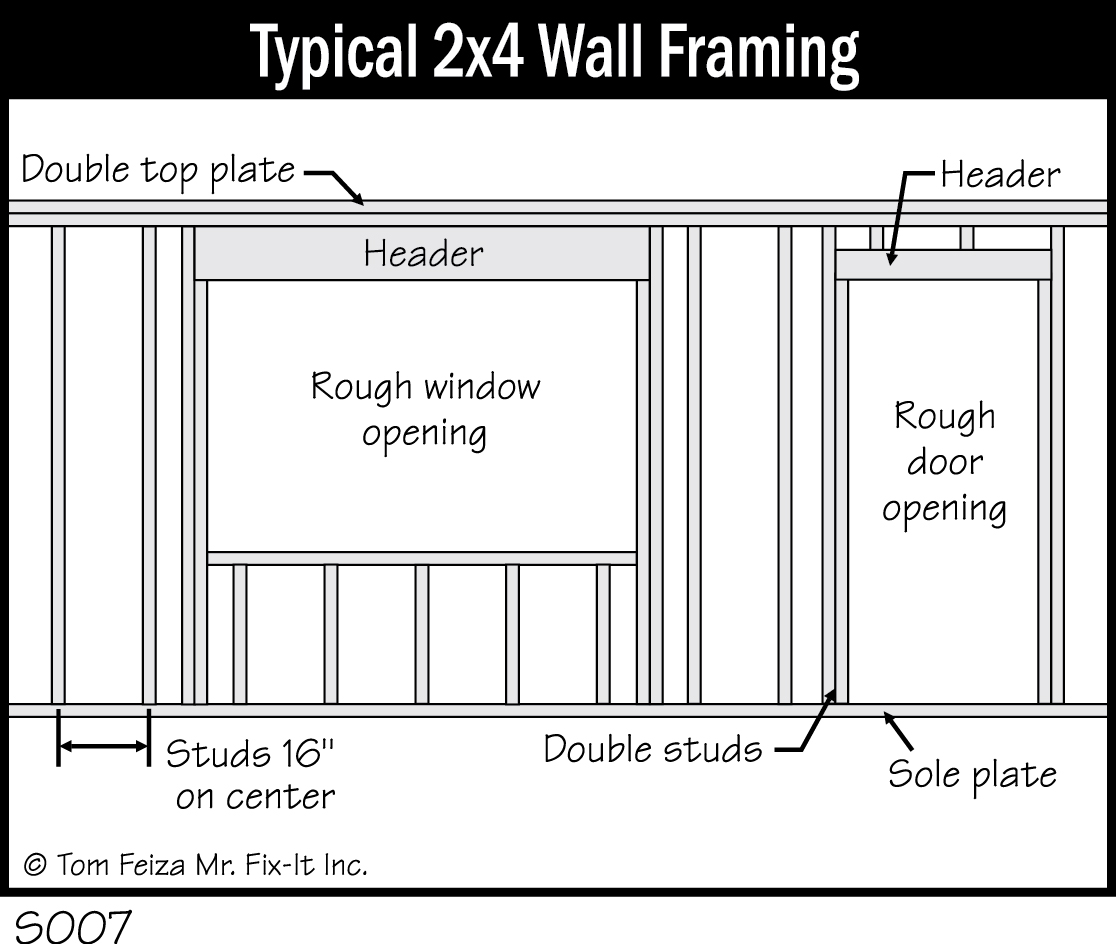
During construction, framing lumber is set 16 or 24 inches “on center,” meaning the individual pieces of lumber are spaced 16 or 24 inches apart. If you measure from the edge of one stud to the corresponding edge of the next stud, the spacing will be 16 inches for a 16-inch-on-center spacing. You could also measure from the center of one stud to another. Most walls, floors and ceilings are framed 16 inches on center for strength and proper support of the drywall covering. One possible exception to this standard of 16 inches on center is for roof (ceiling) trusses.
When the actual wall is assembled, allowances must be made for corners and for penetrations like window and doors, so not all stud spacing is 16 or 24 inch on center. For instance, windows are not always placed exactly between the standard 16-inch spacing, and you will always find additional studs and headers carrying the structural load around windows and doors.
Hidden Keys to Finding Studs
Walls also support drywall and interior woodwork, and they enclose electrical outlets and heating supply/return ducts. All of these items can provide clues to the location of studs.
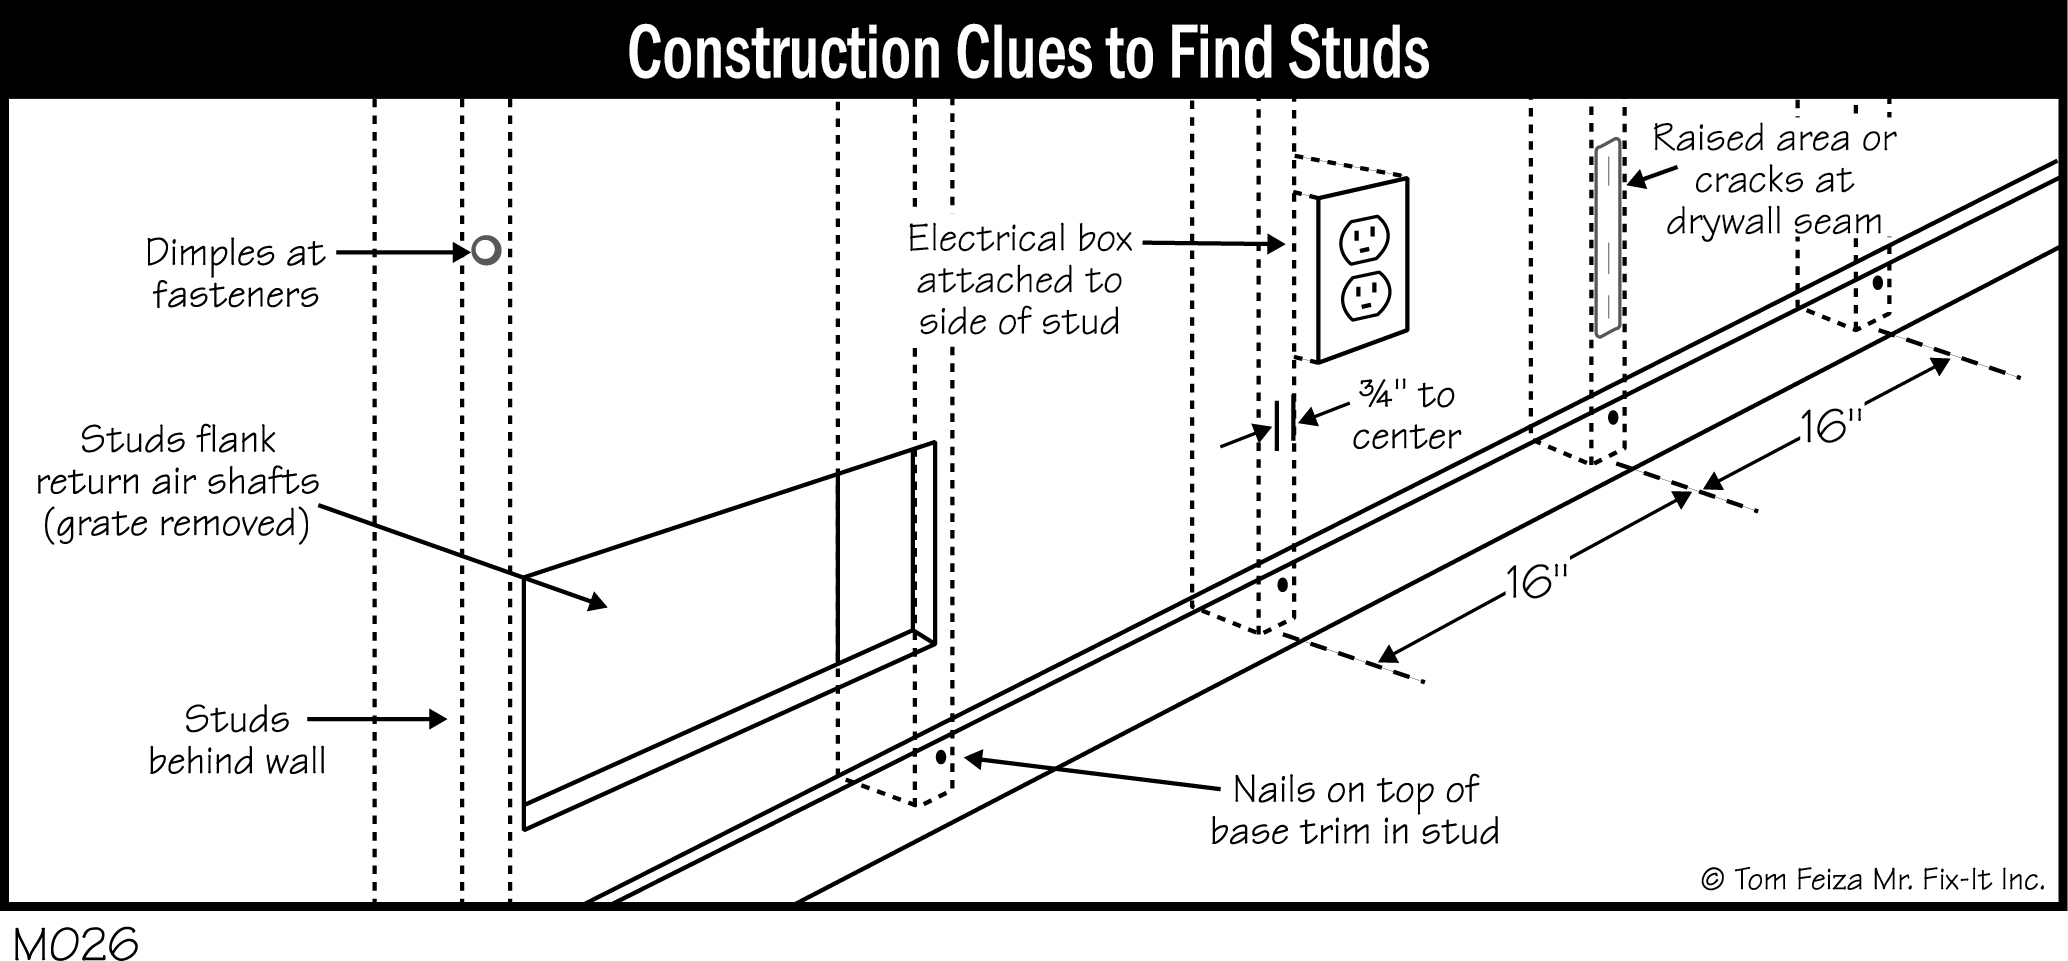
You can start by looking carefully at the wooden baseboard trim. You will see nail holes or filled nail holes near the baseboard’s top edge. This is where nails were used to fasten the baseboard trim to the studs. Baseboard nails can’t be driven into the drywall, so they are always driven into studs.
Electrical outlets are revealing because they are fastened on the side of studs. By carefully removing the plastic outlet cover and looking around the edges of the electrical box, you can determine the location of a stud. The actual center will be located ¾ inch from the edge of the box. (See M026)
Heat return ducts for a forced air furnace may also be mounted in walls. These ducts are typically mounted between two studs and occupy a width of about 16 inches. You can peek into the grill or remove the grill to find the location of the studs on each side. (See M026)
Drywall can also give you some clues. Since drywall edges are fastened over the studs, you can often see the shadows of a tape joint or drywall nail or screw. Use a bright light or flashlight to shine light across the surface at a very flat angle; the light may show the outline of a drywall joint or fastener located at a stud.
Finally, tapping on the wall with your fist or lightly with a hammer may reveal the edge of the studs. Where the studs are located, you may detect stiffer support or a dull “thump.” While this method is hardly scientific, it can give you a general idea of a stud’s location.
Find One, Measure Over
Once you have located a stud, measuring to the side in 16-inch increments will locate the edge or center of adjacent studs. Remember that the measurement is 16 inches on center and that spacing will be interrupted at windows and doors. (See M029)
Most tape measures have special marks indicating the 16-inch-on-center spacing so you can easily measure over in 16-inch increments once you have a starting point.
Electronic Stud Finders
You can also use an electronic stud finder to locate studs. This device senses the density of the wall and locates areas where the wall is more dense—that is, areas over studs. Many stud finders must be calibrated in an area of no studs and then slid across the wall to locate studs by signaling with an indicator light or even a laser beam.
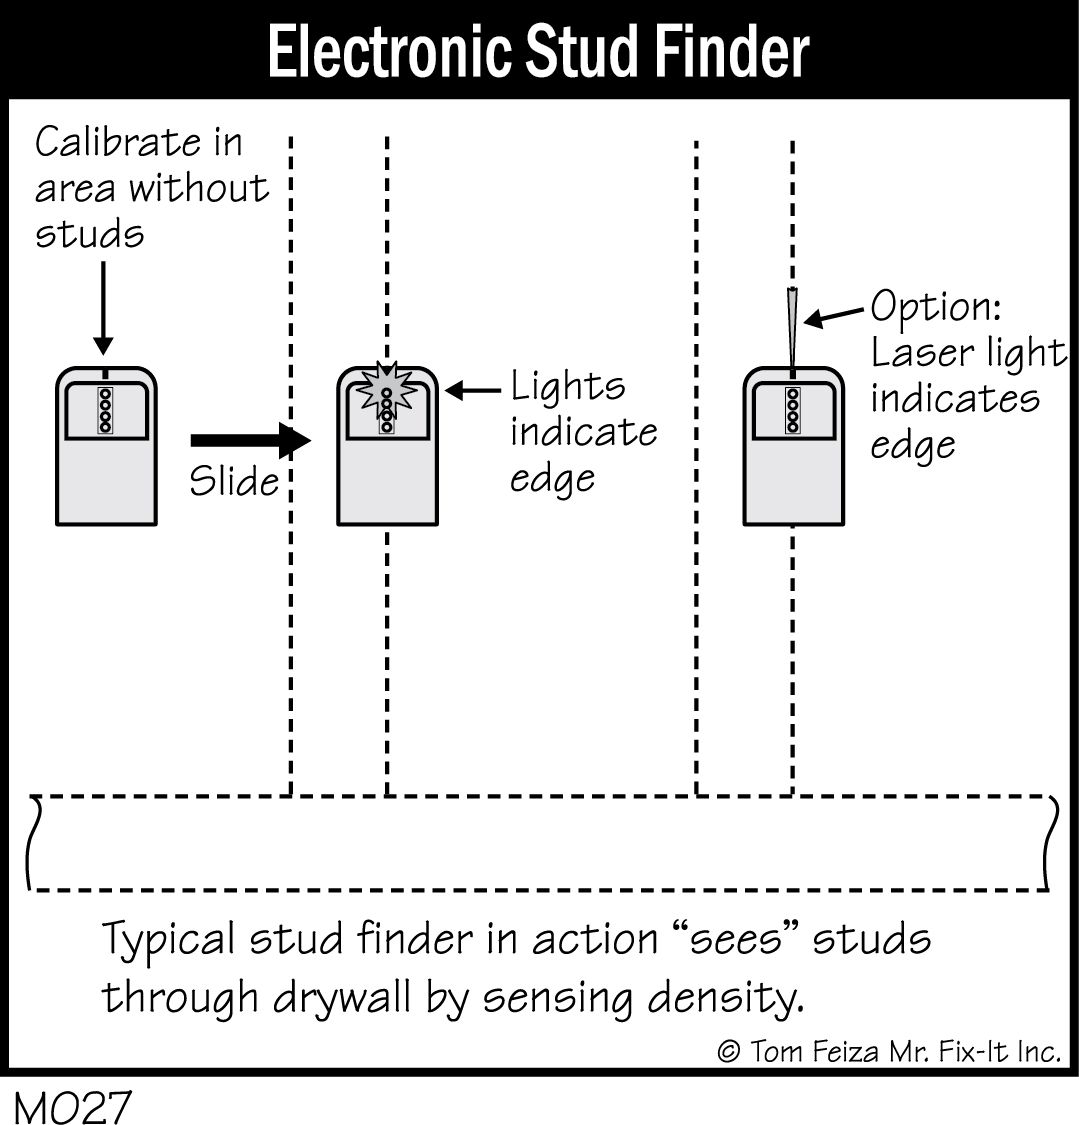
Electrical cables, conduit, piping, metal edges, and anything that changes the density of the area behind drywall can fool stud finders.
Most stud finders locate the edges of the studs, but some will indicate the actual center. More sophisticated stud finders will actually warn you about live electrical cables they sense in the wall.
Stud finders are great tools, but you still must have a basic understanding of wall framing to accurately interpret their output.
Older Homes and Plaster
All the same rules and tips apply to plaster that may be applied to gypsum board, metal lath or wood lath. The only exception is that a stud finder may have a difficult time working with this type of construction. You will also find that plaster walls are so sturdy that you don’t always need to find a stud for a typical hanging chore. Also, keep in mind that 2 x 4 studs may actually be 2 inches by 4 inches in older construction. These studs might be made of hardwood that is very, very hard.
A Final Test
Once you believe you have located the edges of the stud you need, you may still want to make a quick test before you drill a large fastener into the center of the living room wall. You can test the stud location with a small finishing nail driven just above the baseboard molding, through the drywall into the stud. A very small nail hole here will not be noticed, and you can confirm the location of the stud when the nail bites into the wood. Remember that you will need to go through a half-inch of drywall before you reach the stud.